
Polynomial Texture Maps
Polynomial Texture Maps are special texture files which contain biquadratic polynomial coefficients per pixel, modeling the reflectance behavior under varying incident radiance. Even though the format is in heavy use in archeology, I found that the available open-source implementations are rather sparse and therefore wrote a converter for the format. If you checkout and compile ptmconvert, you can turn PTM’s into regular PNG files.
Currently, it will output one RGB image with two additional images containing the 6 coefficients per pixel, 3 in each image. The first image called coeffH.png will contain coefficients 1-3, whereas coeff_l.png contains coefficients 4-6. Since these coefficients have been scaled and biased to fit into unsigned chars, the bias and scale values are printed to the console to reconstruct the values later. Why do this? Below is a WebGL demo showing a PTM with this method. Currently, WebGL is only able to load image data provided by browsers, and thus far it cannot load PTM containers or HDR images with float values. Therefore, one has to rely on standard PNG and JPEG images wit bias and scale values.
The demo below is written with Three.js. If you open the source code of this page you can copy the demo, including shaders. Many thanks to HP Labs for their sample files, from where I took the Ushabti PTM used below.
If you want to create a demo like this with another PTM, just follow these next steps. In this example, we’ll convert the Ushabti PTM from HP to a WebGL friendly format. Have ptmconvert ready and run it on your PTM file.
PS C:\Dev\ptm> ptmconvert.exe .\ushabti.ptm
Width: 512
Height: 1024
Scale coefficients: 2 2 2 2 2 2
Bias coefficients: 160 160 160 127 127 0
You should now have three files in your directory: rgb.png, coeffH.png and coeffL.png looking something like this:
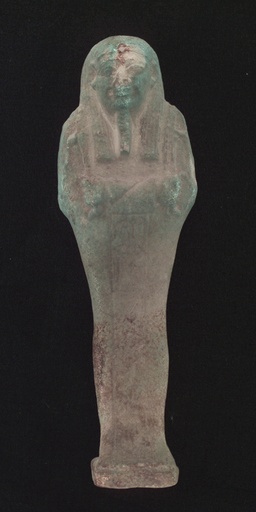

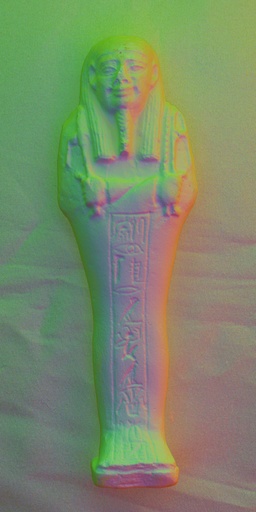
Replace the three textures coeff_h, coeff_l and rgb in the source or your own WebGL implementation. Before running, you have to replace the scale and bias values in the shader with those that were displayed after the conversion. In the code you’ll see four more uniforms:
scaleH: { type: "v3", value: new THREE.Vector3(2, 2, 2) },
scaleL: { type: "v3", value: new THREE.Vector3(2, 2, 2) },
biasH:  { type: "v3", value: new THREE.Vector3(160, 160, 160) },
biasL:  { type: "v3", value: new THREE.Vector3(127, 127, 0) },
Those uniform variables will be uploaded to the fragment shader in order to reconstruct the actual PTM values from the images. And that’s pretty much it. Enjoy!
Here are some links for further research or downloading PTMs to toy with:
- HP Labs PTM research page with PTM set downloads
- Full resolution PTMs of the Antikythera Mechanism
- PTMViewer Java project on Google Code
The code is released under the MIT License.